


Last week I bought a gorgeous strand of red faceted oval beads. I fell in love with the colour immediately because it was such a deep shade of red - perfect for Christmas. The silver and red slider bead adds an elegant touch to the earrings.
Here's today's materials list:
2 x mirror finish silver faceted oval beads
2 x red faceted oval beads
2 silver holly charms
2 red jingle bells
2 silver slider charms accented with a red flatback crystal
18 links Beadalon silver plated Dapped Small Cable chain 2.3mm
2 head pins
2 eye pins
2 x 4mm jump rings
20 gauge non tarnish silver wire
2 interchangeable earring wires
Thread the silver bead onto the headpin and turn a loop. Thread the red bead onto the eye pin, turn a loop but before closing it, attach the silver bead.

You only need 9 links of chain for each earring so separate it into two equal lengths. Attach the holly charm with a jump ring to the chain on the fourth link from the bottom.

Attach the jingle bell to the chain with a jump ring to the second link from the top. Then attach the bottom link of the chain to the red bead component.

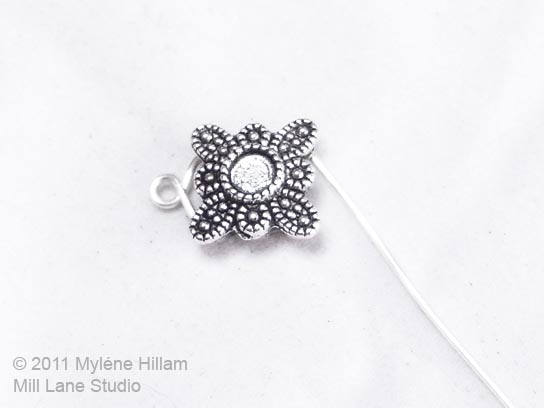
Now we run into a problem: the square focal is a slider bead and it has two channels running along the outside of the slider. So I've come up with a piece of wirework to create a workaround for that. As well as providing a hanging loop it adds a bit of detail.

Cut a 6cm (2.5") length of wire for each slider.

Using flat nosed pliers, turn a 45° angle about 1cm from the end. You will need to trim it to about half the length of the slider.

Place the end into the channel of the slider.

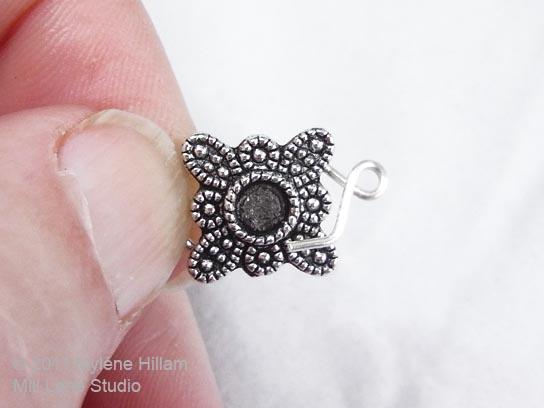
Now, place your round nose pliers where you want to turn a loop, so that it will be centred above the middle of the slider.

Take the wire out of the channel so that it's easier to handle and then turn the loop.

Place the hanger back into the slider and using the flat nose pliers turn a 45° angle so that the wire on each side of the loop is even.

You may need to take the wire out of the slider again to do this.

Place the wire back into the slider

Now work on the other end. Turn a 45° angle like you did in the first step.
Then turn another loop centred in the middle of the slider and then another 45° angle so that it lines up with the channel on the other side.

Trim the wire to half the length of the slider.
And then carefully push it into the channel without distorting the hanger.

Glue in a flat back crystal
And now just finish it off by hooking it on to an interchangeable earring wire and gently squeezing it shut.

Make the second earring in the same way and then dazzle your way through Christmas with these elegant drop earrings.
I hope you're enjoying the Twelve Days and Counting Earrings Spectacular. I'll be back with more ideas next week.
'Til next time.....


If you can't get enough of My Tutorials and you want even more inspiration, click here to find my books and printable pdfs

